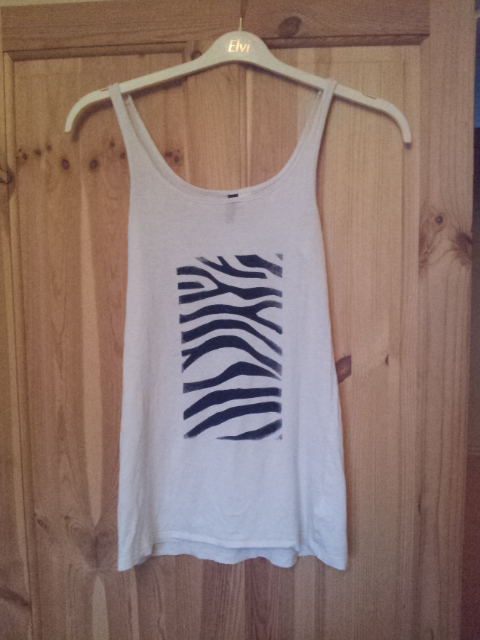
It's Zoo Project festival on Friday, and as I have been getting really into screen printing lately, I thought I would try out a design on an old vest. I have decided to go to Zoo Project as a zebra, so this is the stencil I have used. See my step by step guide below of how to screen print a design at home in under 15 minutes.
Step 1 - Prepare Your Materials
I have used a printed zebra design, a scalpel, a screen printing frame, a squeegee, and a paintbrush (for touching up)
Step 2 - Cut Out Your Design
I have printed my own design from a stencil I found on Google. You can create whatever you want for screen printing, however if you are trying this for the first time then test something simple.
I cut around my design with a scalpel on top of an old book that I don't mind marking.
Make sure you cut your design out correctly and ensure that there is an edge (if you want one) to contain fabric paint within a specific area.
Step 3 - Prepare The Garment
In my case this is an old vest that I am testing the design on. I have inserted a hard canvas in-between the vest to stop any fabric paint slipping through to the other side.
If you have a larger garment then you may want to pin it tight at the back to ensure the fabric paint is printed correctly.
Step 4 - Print The Garment
I have placed the cut-out stencil on top of the vest and then put the screen printing frame on top of the stencil. I inserted some plain paper around the stencil to make sure excess paint doesn't go onto the vest. When ready, add a big blob of your fabric paint just above the stencil.
If this is your first time using your screen printing board then make sure you follow the correct instructions for set up (pre-wash) ext.
Step 5 - Screen Print
Use the squeegee to push the paint over the stencil and repeat up and down a few times to ensure an even coverage. I have put my knee over the board to make sure it doesn't slip.
Step 6 - See Results
When finished printing, slowly and carefully remove the frame from the garment.
When removed, ensure that you wash your screen printing frame thoroughly to remove the fabric paint and decrease staining.
Step 7 (If Needed) - Touch Up
If your print is slightly transparent in places, then use a small paintbrush to touch up the design.
Step 8 (Or 7) - Ready To Roll
When finished hang up to fully dry.
When dry, iron the garment on the reverse side with no steam to seal the fabric paint.
Now I am ready for zoo project!! I can't wait!


0 comments:
Post a Comment